Tool Time is a new monthly series where we ask chefs to share their favorite kitchen tools for accomplishing a specific culinary task.
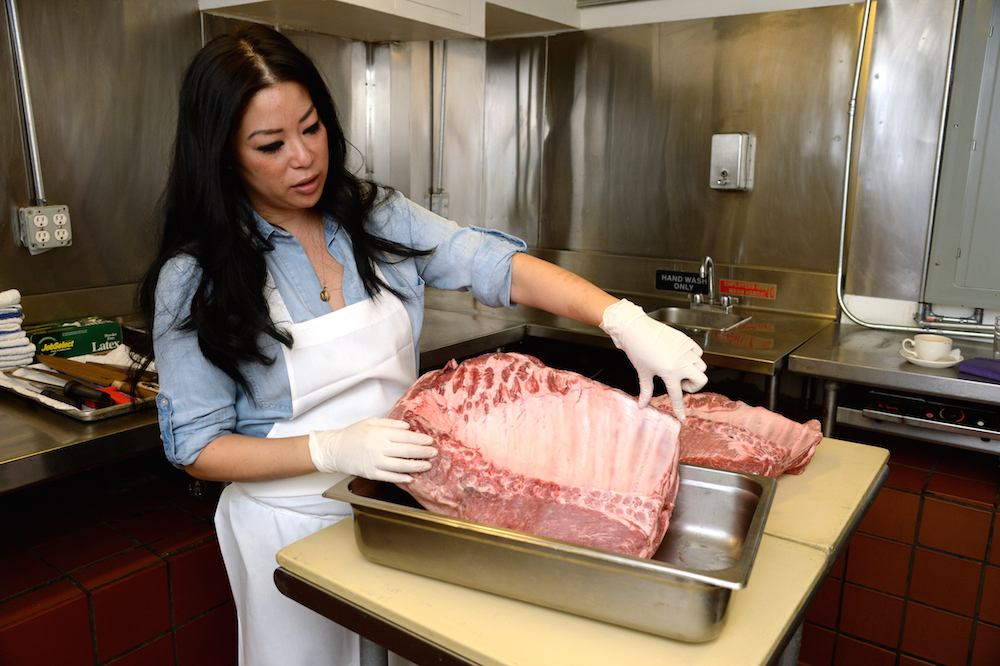
On a recent Sunday afternoon, Angie Mar, the Executive Chef at The Beatrice Inn, is down in the basement of Graydon Carter’s celebrated West Village restaurant wrangling a couple of tomahaawk racks. First meeting Mar, you wouldn’t expect that the petite chef is one of the most skilled nose-to-tail butchers in New York with a culinary pedigree that includes The Spotted Pig, and kitchens within the Tarlow empire—Reynard, Marlow & Sons, and Diner. She regales us with tales of cooking a 1,000-pound steer for 25 hours on-site (and moving it with a forklift) for Meatopia, “The Woodstock of Edible Animals,” where chefs cook whole animals over open flames. She speaks passionately about the importance of responsibly raised meat and honoring animals by using as much as possible—meat, lard, bones, offal.
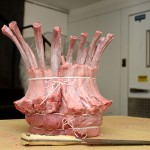
In anticipation of the holidays, Chef Mar is showing us how to butcher and prepare the most dramatic of holiday roasts—the crown roast. With its architectural composition (Niemeyer’s Brasilia Cathedral, anyone?) it’s perfect for impressing and serving a crowd. And with a little bit of determination and the right tools, a pretty straight-forward proposition. Here, we talk to the chef about her favorite butchering knives, why brittleness is important and making and using beautiful things.
BONUS: We’ve included an illustrated step-by-step guide for prepping the Crown Roast. If you make one yourself, tag @thisismold so we can check out your handiwork! We’ll publish our favorites here.
MOLD: Making something as dramatic as a crown roast seems like a pretty daunting task. What is the most essential knife to use for prepping the roast and why?
Angie Mar: Yes, it does seem like a big project at first glance, doesn’t it? Making a crown roast is actually quicker than you might think, once you’re familiar with the anatomy of the meat and you’ve got the right tools. My favorite knife when I’m working with something like a crown roast is a boning knife that measures six to seven inches, as well as a butcher knife. Most people always like the feel of a large chef’s knife, but honestly for the fine detail work you need to do with a crown roast, a boning knife is the most versatile. The blade is short, thick and brittle, and it’s important for cleaning all of those bones.
What are the most important things you consider when buying and using a boning knife? Why?
I’m a pushover when it comes to new knives. Even if I don’t need them, I always seem to acquire more. Weight is incredibly important to me when I’m shopping for a chefs knife or a slicer. My favorite slicer in my collection is a beautiful limited addition Japanese made, steel that was modeled after a hunting knife. It’s got a stag horn handle and I love that it shows it’s age as I use it.
For boning knives, I look for the type and thickness of the steel. I prefer the blade to be thicker, brittle and to be able to hold its edge. It’s also important to me to have stain-resistant steel. I never like when color or oxidization transfers from my blade to a perfectly white piece of halibut or a beautiful piece of beef. Most of my Japanese knives are VG-10, or Swedish steel, and have a 70/30 bevel on the blade.
You mention “brittleness” as a quality you look for in a knife. Why is this something that you prefer? How does it effect the knife’s functionality?
Brittleness is definitely something I look for in a boning knife specifically. I like that the blade is thick and not flexible, as opposed to some knifes that may be used for fish. When I’m working with large pieces of meat and bone, it’s important to have that quality in a boning knife to give you more control and maneuverability.
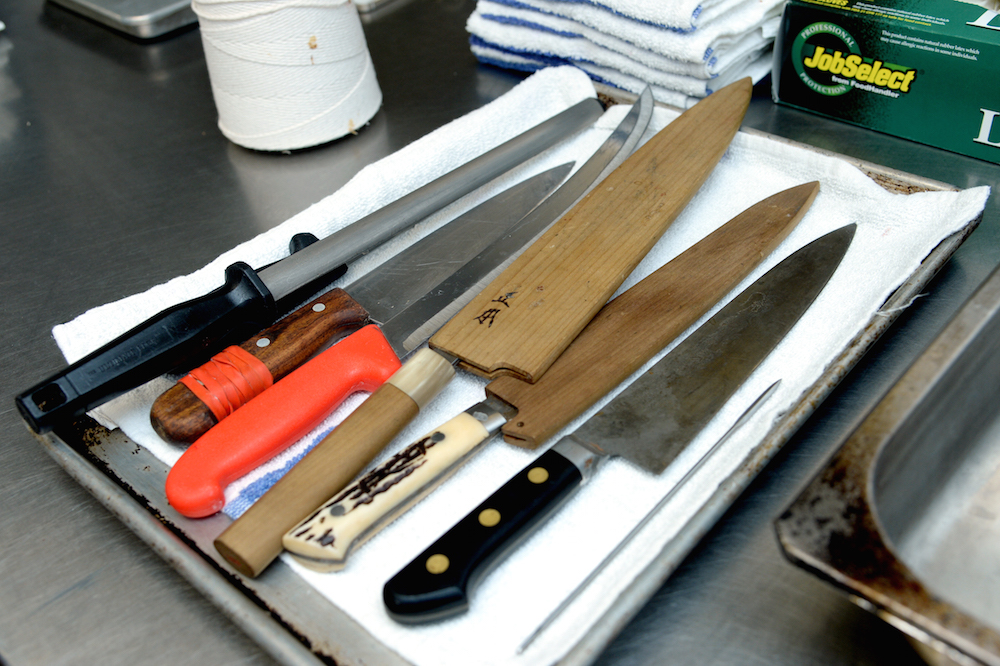 L-to-R: boning knife, honing steel, Japanese deba knife, scimitar, Masamoto chef’s knife, slicer, Misono chef’s knife
If you could design a version of this knife specifically for prepping a tomahawk rack, what would you change?
There’s nothing really about the ergonomics of the boning or the butcher knife that I’d change, but I’d be thrilled to design a knife. I’m always on the hunt for knives that are as visually stunning as they are utilitarian. If we are going to create something as beautiful as a tomahawk crown roast, then we may as we’ll begin with a beautiful knife, right?
Pork Crown Roast With Challah, Apple & Chestnut Stuffing
Serves 16 people
INGREDIENTS
For the pork:
- 2 tomahawk racks of pork, 8 bones each, frenched
- ½ cup fresh savory, picked
- 6 whole garlic cloves, peeled and germ removed
- 1 bunch thyme
- Kosher salt
- Olive oil
- Trussing twine
- Trussing needle
For the stuffing:
- 8 cups challah bread, torn into 1-2 inch pieces, crust left on
- 3 firm apples, preferably honeycrisp, cut into wedges
- ¼ cup rendered pork fat (see butchering instructions)
- 1 cup bacon, chopped
- 1 large onion, small dice
- ½ head celery, sliced
- 2 cups peeled chestnuts, roasted until meats are tender, or frozen and peeled chestnuts
- ½ cup sage, chopped
- ½ parsley, chopped
- 4 cups chicken or pork stock
- Salt
- Pepper
PREPARATION
To Butcher and Form the Crown Roast:
NOTE: At the restaurant, I like to clean, French and season the racks with salt, a day before I form and cook the roast. This allows the meat to cure and the seasoning to permeate the entire roasts. If you have the time, it’s well worth it.
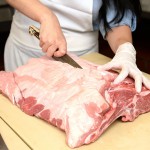
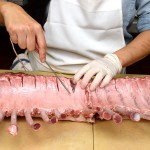
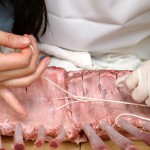
- Remove the meat from above the eye of the roast, that runs along the rib bones. Trim any fat and render it as you will use it for the stuffing.
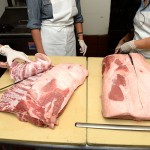
- Working between the bones, run your knife down against the first bone, and then up against the bone that it sits next to. Repeat on both racks until all the meat from between each bone is removed.
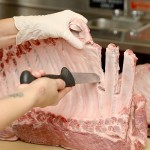
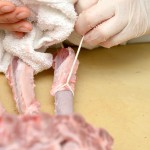
- To clean, or “french” each bone, run a sharp knife along each bone, scraping the cartilage away until it is clean. Or, tie trussing twine around each bone and pull sharply to remove the remaining meat and cartilage.
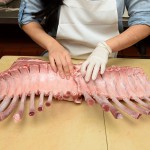
- On each rack, with the bones facing up, cut slits into the meat, about 1 inch deep, in between each bone on the rack. This will give the meat the flexibility it needs when you are forming it into a crown.
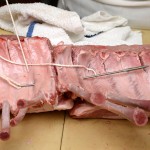
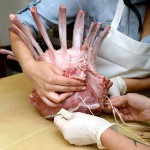
- With the bones facing up, place the two racks next to each other. Using a trussing needle and thread, stitch both racks together along the seam. Lace the twine through the inter coastal meat that lies in between the first and second rib bones on each rack and the eye of the meat between the first and second rib bones on each rack as well.
- Sit the racks on your cutting board, right side up. With the bones facing out, bend the rack into a crown and, using trussing twine, stitch the other side of both racks together as you did the first side.
- Using trussing string, tie the crown around the base of the roast, the bottom of the bones, and the top of the meat, right where the bones are clean. Using your hands, mold the crown until you form a perfect circle. You are now ready to season and cook.
- Season aggressively with salt and store in the refrigerator while you make stuffing.
For Stuffing:
NOTE: this can be made up to two days before, and the flavor will actually improve with time.
- Preheat oven to 350°.
- Toast the challah bread pieces until golden brown. Transfer to large baking dish or casserole.
- In a large skillet, heat pork fat over medium high heat. Sauté apples until they turn golden. Season with salt and pepper. Add one ladle of stock and cook until just tender. Allow to cool and then chop to bite size pieces and add to bread.
- In another large skillet, sauté bacon pieces over medium high heat, when fat begins to render and bacon turns golden, add onion and celery. Season to taste with salt and pepper, sautéing until golden and soft. Add herbs and chestnuts and toss to incorporate. Add to bread mixture.
- Heat stock and season lightly with salt to taste. Pour over stuffing mixture and toss to incorporate and so the bread absorbs it. Check seasoning and set aside to cool.
For the Pork:
- Preheat oven to 450°.
- After letting the crown sit seasoned for at least an hour, cut small slits into the eye of the meat with a pairing knife, evenly around the crown, about ½ inch deep. Insert one garlic clove into each slit.
- Roughly chop the savory, mix with about 2 tablespoons olive oil and 2 tablespoons more salt. Coat the roast inside and out in the herb mixture.
- Place a resting rack in the center of a baking dish. Scatter the thyme sprigs all around and place the crown roast on top. Bake at 450° until golden all around, about 20 minutes, rotating half way through.
- Lower the heat of the oven 325°F. Continue to cook until the center of a thermometer reads 120°F, about 30 minutes. Remove the roast from the oven and stuff the center of the roast with apple stuffing.
- Return to oven and cook until the center of the meat registers at 135°F for medium, and the stuffing is heated through and golden brown. About 20 minutes.
- Remove and let rest for 15-20 minutes before serving.